Add Row
Add Element
cropper
update
Pro Home Guides
update
Add Element
  • Home
  • Categories
    • Home Design & Inspiration
    • Home Renovation & Project Planning
    • DIY Home Improvement & Repairs
    • Pro Contractor Insights & Business Growth
    • Technical Tips & Best Practices
    • Outdoor Living
April 21.2025
3 Minutes Read

Unlock Easy Grout Repair Techniques for DIY Enthusiasts

Close-up of DIY grout repair with float and premixed grout bucket.

Mastering Grout Repair: Your Comprehensive DIY Guide

Grout repair is a vital skill for homeowners who wish to maintain the aesthetic and structural integrity of their tiled surfaces. Whether you're dealing with unsightly cracks or moldy grout lines, learning how to repair grout is not only cost-effective but also a rewarding DIY project. This article delves into the step-by-step process of grout repair, essential tools, and tips to ensure your tiles remain in pristine condition.

Understanding the Importance of Grout in Home Design

Grout serves as a crucial component in tile installations. It fills the gaps between tiles and provides stability, preventing water infiltration that can lead to mold or structural damage. Proper grout maintenance enhances the overall appearance of your home’s decor, making it essential to address any damage quickly. Grout also plays a significant role in cleanliness; well-maintained grout minimizes mold growth and stains.

Tools You’ll Need for Grout Repair

To repair grout effectively, gather the following tools:

  • Grout saw or scraper: This tool will help you remove old grout.
  • Grout float: This is used to apply the new grout.
  • Sponge: Essential for cleaning surfaces and smoothing grout lines.
  • Bucket: For mixing grout and water.
  • New grout: Select a grout color that matches your existing tiles.

Step-By-Step Grout Repair Procedure

Follow these detailed steps to repair your grout:

  1. Assess the Damage: Determine how much grout needs replacing. Look for crumbling or discolored areas.
  2. Remove Old Grout: Use the grout saw to carefully remove damaged grout between tiles. Be cautious not to scratch the tiles.
  3. Clean the Area: Clear away debris and dust from the gaps using a sponge and water to ensure proper adherence of new grout.
  4. Mix New Grout: Follow manufacturer instructions to mix the grout to a smooth consistency.
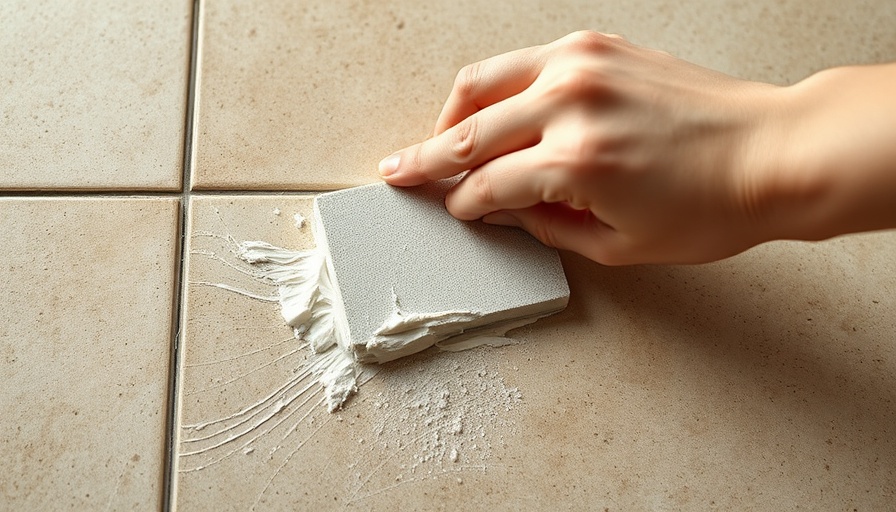
  5. Apply New Grout: Use a grout float to press the new grout into the gaps, ensuring it's level with the tile surface.
  6. Smooth the Grout Lines: With a damp sponge, smooth out the grout lines and wipe away excess grout.
  7. Let it Cure: Allow the grout to cure according to the manufacturer's instructions, usually 24 to 48 hours.
  8. Seal the Grout: For added protection, apply a grout sealer to help resist stains and moisture.

Common Grout Repair Mistakes to Avoid

While grout repair is accessible to many, some common mistakes can compromise your results. Here are a few pitfalls to avoid:

  • Skipping the Cleaning Step: Neglecting to clean the area can result in poor adhesion and a weak bond.
  • Using the Wrong Type of Grout: Ensure the grout you're using is suitable for your specific tile type (e.g., ceramic vs. natural stone).
  • Incorrect Water Ratios: Mixing grout with too much water can weaken its composition.
  • Not Allowing Sufficient Curing Time: Rushing the process can lead to cracks and further damage.

Future Trends in Grout Technology

Staying informed about advancements in grout products can enhance your DIY capabilities. For instance:

  • Epoxy Grout: Increasingly popular for its durability and stain resistance.
  • Pre-mixed Grouts: These products ensure consistency and ease of use, making repairs even more manageable for DIYers.
  • Green Grouts: Environmental concerns have led to the development of eco-friendly grout options.

Concluding Thoughts on Grout Repair

DIY grout repair may initially seem daunting, yet it's readily achievable with a clear understanding of the process and tools involved. Not only will resolving grout issues improve your home’s appearance, but it will also extend the longevity of your tile surfaces. Don’t overlook this crucial aspect of home maintenance. Ready to tackle your grout repair? Gather your materials and get started today!

DIY Home Improvement & Repairs

Write A Comment

*
*
Related Posts All Posts
09.13.2025

Unlocking Comfort: Why Blackout Curtains Are Essential for Your Home

Update Understanding Blackout Curtains: More Than Just Darkness Choosing the right window treatment goes beyond aesthetics; it's about creating a comfortable home environment. Blackout curtains are essential for blocking light, reducing noise, and conserving energy, making them a popular choice for homeowners seeking peace and tranquility in their spaces. These specialized curtains prevent sunlight from penetrating through windows, which not only aids in better sleep but also maintains a consistent indoor temperature, ultimately leading to energy savings. The Science Behind Blackout Technology Blackout curtains are designed with unique materials that block light. Manufacturers employ thicker fabrics, often woven with a special backing that prevents light seepage. This functionality is backed by physics—darker, heavier fabrics absorb light rather than allow it to filter through, meaning that even during the brightest days, rooms can be kept completely dark. As homeowners increasingly seek solutions that prioritize energy efficiency, the popularity of blackout options will only grow. Benefits of Blackout Curtains: Why They Matter 1. Sleep Quality: Many studies link adequate sleep with reduced exposure to light at night. Blackout curtains provide a solution by keeping bedrooms dark, supporting the body’s natural sleep cycle. 2. Noise Reduction: Noise pollution can impact health and productivity. Thicker blackout curtains can serve as sound barriers, dampening external sounds and creating a peaceful environment. 3. Energy Efficiency: They maintain temperature by preventing heat exchange; in winter, they retain warmth, while in summer, they keep spaces cooler. This can lead to significant savings on energy bills. Selecting the Right Blackout Curtains for Your Home When considering blackout curtains, homeowners should assess fabric weight, insulation capability, and how well they fit their window frames to ensure maximum effectiveness. Brands like Eclipse and L.L.Bean are lauded for their energy-efficient designs that adapt to various home styles. Considerations also include color, style, and whether the material might require specific cleaning methods. Installing Blackout Curtains: Tips and Insights Installation can significantly impact the effectiveness of blackout curtains. Hanging them a few inches above the window frame can block light around the edges. Hardware like curtain rods or clips should be sturdy; an improperly hung curtain can detract from its intended benefits. Additionally, layering blackout curtains with sheer drapes allows flexibility in managing light throughout the day. Addressing Misconceptions About Blackout Curtains A common misconception is that blackout curtains are only suitable for bedrooms. In reality, these versatile solutions enhance comfort throughout the home, in areas like home theaters, nurseries, and even living rooms, making them equally functional during the day as at night. Future Trends in Window Treatments As technology advances, the integration of smart home devices with window treatments is on the horizon. Imagine automated curtains that adapt based on outside light levels or temperature. With the rise of smart technology in homes, the future of window treatments, including blackout curtains, appears to lean towards increased functionality and customization. Final Thoughts: The Impact of Choosing Blackout Curtains As homeowners become more conscious of energy usage and overall comfort, the demand for solutions like blackout curtains will continue to rise. By understanding the benefits and functionalities of these home essentials, homeowners can make informed decisions that enhance their living environments. Finding the right blackout curtains can transform your space. If you're ready to enhance your home's comfort and energy efficiency today, explore various options tailored to your needs.

09.12.2025

Protect Your Carpet From Chair Damage: The Essential Chair Mat Guide

Update Why Protecting Your Carpet is EssentialMany homeowners underestimate the damage office chairs can cause to carpets. Even with minimal movement, the weight and mobility of chairs can lead to fraying, discoloration, and indentations in the pile. When investing in a beautiful carpet, ensuring long-term protection is essential. Chair mats are an effective solution that not only preserves the carpet's condition but also enhances the aesthetic of your workspace.Understanding Chair MatsChair mats are protective coverings that sit under rolling chairs to prevent wear on carpets. They are typically made from materials like vinyl, polycarbonate, or even bamboo. Each type offers unique benefits suited to different environments. For example, polycarbonate mats are particularly durable, making them ideal for heavy traffic areas. Understanding your office space needs helps in selecting the right type of mat.Choosing the Right Chair Mat for CarpetThe right chair mat can vastly improve mobility while safeguarding your carpet. Look for features that fit your specific requirements:Thickness: Thicker mats tend to be more durable and resistant to cracking.Shape & Size: Choosing the correct shape and size ensures optimal coverage and effectiveness.Material: Consider a mat that complements your carpet and meets your mobility needs.Benefits of Using Chair MatsInvesting in a chair mat provides numerous advantages:Protects Carpeting: Reduces the wear and tear on your carpets.Enhances Mobility: Allows for smooth movement of chairs, improving comfort and productivity.Easy to Clean: Most mats are easy to clean, requiring only a damp cloth or mop.Common Misconceptions about Chair MatsOne common misconception is that all chair mats are universal. In reality, the right mat must be chosen based on both the type of carpet and the chair's mobility features. Another misconception is that chair mats are only necessary for office setups. However, they are beneficial in any home setting where rolling chairs are used.Tips for InstallationInstalling a chair mat is relatively straightforward. Here are some easy steps:Ensure your carpet is clean and dry before laying down the mat.Unroll the mat and allow it to rest on the carpet to unfurl completely.Position the mat where the chair is most frequently used.Proper installation enhances the effectiveness of the mat and extends its lifespan.Future Trends in Chair MatsThe market for chair mats is evolving with increased focus on environmentally friendly materials. As consumers become more conscious about sustainability, manufacturers are introducing mats made from recycled materials. Innovations in design are also emerging, with features like anti-static properties and ergonomic designs to improve user experience. This suggests a growing trend not only in functionality but aesthetics as well, leading to chair mats that are as much about design as they are about protection.Conclusion: Take Action for Home Protection!Investing in a chair mat is a wise decision for anyone looking to protect their carpet from damage. Not only do these mats extend the life of your flooring, but they also enhance your workspace's functionality and appearance. With many options available, it's essential to choose one that fits your specific needs. Visit your local home improvement store or shop online to find the perfect chair mat today!

09.11.2025

Unlock a Bountiful Harvest: The Best Tomato Cages for Success

Update Why Tomato Cages Matter for a Thriving Garden For homeowners engaged in gardening, especially those with a passion for growing their own vegetables, using effective tools can make a world of difference. Tomato cages serve more than just a functional purpose; they help maintain plant health by promoting vertical growth, reducing the risk of disease, and ensuring sun exposure for all branches. Proper support systems can lead to a bountiful harvest that not only enhances a gardener's enjoyment but also promotes sustainability. Types of Tomato Cages to Consider When selecting a tomato cage, it's essential to weigh the options available, each with its unique advantages: Staked Cages: Perfect for lighter varieties, staked cages offer a simple method for keeping plants upright while allowing for easy access to ripening fruit. Wire Cages: These versatile structures come in various heights and shapes, providing ample support for sprawling growth. Collapsible Cages: Ideal for downsized gardens or urban settings, these cages ease storage and setup while still offering robust plant support. The Benefits of Using High-Quality Cages Investing in a durable and effective tomato cage can decrease the risk of plant damage and reduce the amount of time spent on maintenance. High-quality materials, such as rust-resistant metal or thick plastic, ensure a long lifespan and promote consistent growth patterns. Practical Tips for Setting Up Your Tomato Cages Follow these tips to maximize the effectiveness of your tomato cages: Choose the right size: Ensure your cage is compatible with the tomato variety you’re planting. Install early: Set cages in place when the plants are young to avoid damaging roots later. Secure the base: Tie or stake down the cages if your garden area is prone to wind. Emotional Connections: Gardening for Wellbeing Gardening, especially cultivating tomatoes, can act as a therapy, fostering an emotional connection to the land. This experience promotes physical activity, mindfulness, and a sense of accomplishment when harvest time approaches. For many, the mere act of growing vegetables becomes a path to personal fulfillment and practical learning. Future Trends in Gardening Tools As technology advances, the integration of smart gardening tools with IoT devices may soon transform how we approach gardening. Imagine sensors in your tomato cages that monitor soil conditions and advise optimal care! The future may hold exciting developments that enhance the gardening experience further. Concluding Thoughts: Maximizing Your Tomato Harvest In conclusion, choosing the right tomato cage is essential for a flourishing tomato plant and a rewarding gardening experience. By embracing various cage types and implementing practical tips, gardeners can optimize their yield and protect their plants. It’s an investment not just in tools, but in the craftsmanship and sustainability of our food sources. For those eager to develop horticultural skills and engage in responsible gardening practices, consider researching further on high-quality tomato cages and effective gardening strategies.

Terms of Service

Privacy Policy

Core Modal Title

Sorry, no results found

You Might Find These Articles Interesting

T
Please Check Your Email
We Will Be Following Up Shortly
*
*
*