 Add Row
  Add
Add 

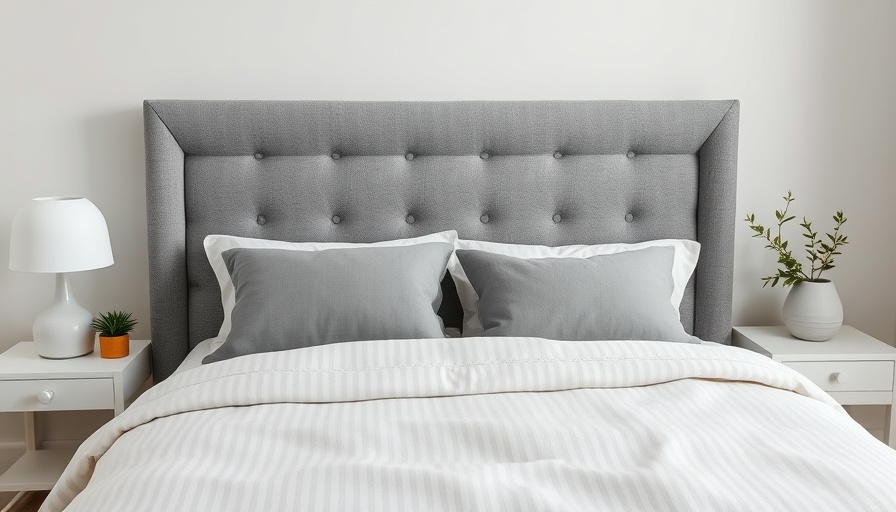
Transform Your Bedroom with a DIY Upholstered Headboard
Creating a warm, inviting atmosphere in your bedroom doesn’t have to come at a hefty price. Building your own upholstered headboard is a straightforward DIY project that can be completed in just a few hours and for under $50. Whether you're outfitting a guest room or giving your own bedroom a facelift, this guide walks you through making a headboard that balances style with budget-friendly considerations.
Why Choose a DIY Upholstered Headboard?
Many homeowners face a dilemma when it comes to furnishing their spaces. How do you achieve a polished look without overspending? Purchasing pre-made headboards often comes with a steep price tag, especially for customized sizes. By taking on this project, you not only save money but can also personalize the look to complement your existing decor. For example, while the average cost for a ready-made padded headboard can range significantly, making one yourself can keep expenses down to under $50 or even less if you’ve got spare materials at home.
Tools and Materials Required
Getting started requires minimal tools and basic materials. Here's a simplified list to kick off your project:
- ½" or ¾" plywood cut to size (about 60-62 inches wide and 26-40 inches tall)
- 1-inch thick upholstery foam
- Twin-size quilt batting
- Medium-heavyweight fabric (enough to cover the whole headboard)
- Heavy-duty staple gun
- ⅜" staples
- Fabric scissors
- French cleat for hanging the headboard on the wall
Step-by-Step Guide to Creating Your Headboard
1. Cutting the Plywood
Begin by cutting the plywood to the desired dimensions. Most standard queen beds measure 60 inches in width, so aim for a headboard width slightly more than this for aesthetic appeal. If you’re unsure how to cut the plywood correctly, many home improvement stores provide cutting services to make this step easier.
2. Preparing the Foam and Batting
Selecting the right foam is essential as it will define the comfort level. A 1-inch thickness usually suffices for headboards, providing a balance between comfort and profile. Cut the foam larger than the plywood to soften the corners and edges as it wraps around the frame. Follow this by laying down the batting and attaching it to the back side of the plywood, starting in the middle and working outward.
3. Adding the Fabric
Your choice of fabric can transform the entire look of your headboard. Make sure to iron out any wrinkles beforehand so that the finish appears seamless. Wrap the fabric around the headboard, maintaining tension for a crisp finish, and staple it to the back. Ensure that the fabric patterns align properly for a professional appearance.
4. Final Assembly
Once the fabric is secure, it’s time to hang the headboard on your wall. A French cleat offers a sturdy solution. Alternatively, you could attach the headboard directly to the bed frame for a more integrated look.
Finishing Touches: Customize to Your Style
One of the joys of a DIY headboard is the opportunity to make it uniquely yours. Consider incorporating decorative elements like nailhead trim or a personalized fabric choice that resonates with your aesthetic. You might choose a classic linen for a timeless appearance, or vibrant patterns that speak to your personality.
Common Misunderstandings About Upholstered Headboards
Many homeowners believe that DIY headboards are only feasible for skilled craftsmen. On the contrary, creating a plush, inviting headboard can be achieved by anyone willing to follow some simple instructions. Additionally, there's a misconception that headboards need to be heavy or overly complex. As shown in this guide, a straightforward design can yield stunning results, enhancing your bedroom instantly.
Emotional Appeal: The Heart of Your Sanctuary
Investing time and creativity into your living space can be a deeply satisfying endeavor. Your bedroom is a sanctuary—a space of rest and rejuvenation. By crafting your own upholstered headboard, you don't just enhance the room; you embed your unique narrative into its design. Whether it serves as a backdrop for peaceful nights or vibrant mornings, that headboard will be a reflection of you.
Get Started on Your DIY Project!
With these instructions and insights, you’re well-equipped to embark on creating a beautiful headboard that marries function with personal style. Why settle for something generic when you can tailor your creation to fit your vision? Dive into your DIY journey today and elevate your bedroom experience.


Write A Comment