Add Row
Add Element
cropper
update
Pro Home Guides
update
Add Element
  • Home
  • Categories
    • Home Design & Inspiration
    • Home Renovation & Project Planning
    • DIY Home Improvement & Repairs
    • Pro Contractor Insights & Business Growth
    • Technical Tips & Best Practices
    • Outdoor Living
August 21.2025
3 Minutes Read

Master the Art of Caulking Windows: Essential Dos and Don’ts

Caulking Windows Dos and Don'ts: man caulking window

Why Caulking is Essential for Home Durability

Caulking your windows is more than a mere cosmetic upgrade; it plays a critical role in protecting your home from moisture and pests. Gaps and cracks can lead to significant water damage, resulting in costly repairs and a decrease in air quality due to mold growth. For homeowners looking to maintain the longevity of their homes, engaging in proper caulking techniques is vital.

The Essential Tools and Materials for Caulking

Before embarking on your caulking project, it’s important to gather the right tools. You’ll need a caulking gun, the appropriate sealant (whether it be latex, silicone, or polyurethane), a utility knife for precision cuts, and painter’s tape to ensure clean lines. Utilizing these materials effectively can lead to professional-looking results that enhance the aesthetics and functionality of your windows.

Common Mistakes to Avoid When Caulking

Despite good intentions, many DIYers fall into common traps that diminish the quality of their caulking efforts. One major mistake is failing to clean the surface before application. Dirt or moisture can interfere with adhesion, compromising the seal's effectiveness. Additionally, applying too much or too little sealant can create uneven lines or gaps, resulting in further maintenance down the road. Understanding these pitfalls isn't just crucial for aesthetics; it's an investment in your home's integrity.

Step-by-Step Guide to Caulking Windows Like a Pro

1. **Preparation:** Begin by removing any old, damaged caulk using a utility knife. Scrub the area clean and ensure it's completely dry.

2. **Taping:** For edges that require clean lines, apply painter’s tape to the areas adjacent to where you’ll apply the caulk.

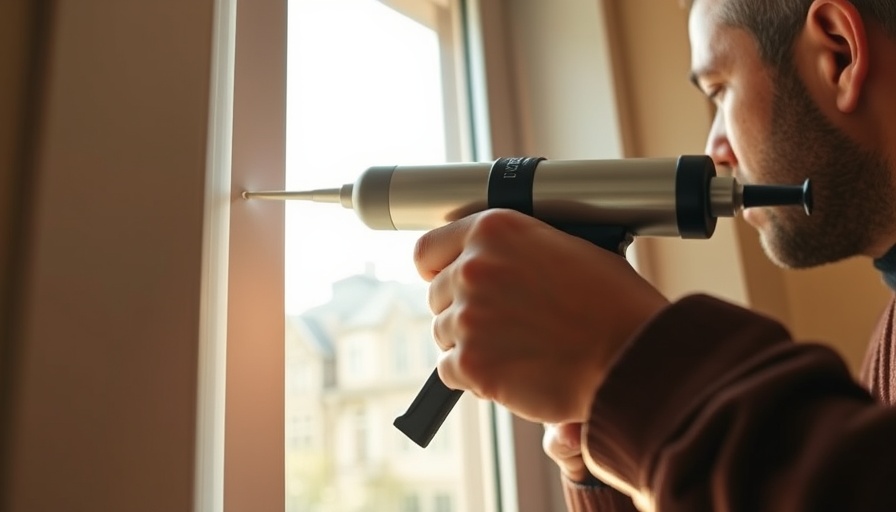
3. **Application:** Load your caulking gun and apply an even bead of caulk at a 45-degree angle, ensuring to fill gaps adequately without excess.

4. **Smoothing:** Use a caulking tool or your finger to smooth the bead, creating a uniform surface while ensuring it makes full contact with both the window frame and the wall.

5. **Removing Tape:** Carefully remove tape before the caulk dries to ensure clean lines.

6. **Curing:** Allow the caulk to cure as per the manufacturer's recommendations for optimal results.

The Future of Window Insulation: Trends to Watch

As technology in home improvement evolves, new materials and techniques are emerging that promise not only better aesthetics but enhanced functionality. Innovations in eco-friendly caulks and thermal insulation materials are becoming more popular, emphasizing the need for sustainable practices in home maintenance. Contractors and homeowners alike should stay informed about these advancements to ensure their investments yield the best possible outcome.

Expert Perspectives: What Professionals Say About DIY Caulking

It's always beneficial to learn from the pros. Experts recommend that DIYers consult instructional materials or videos specific to their product, as there can be significant differences in how various sealants behave. Furthermore, many contractors advise against sealing large gaps with traditional caulk and instead recommend foam insulation or other appropriate materials for best results.

Evaluating Cost-Effectiveness: DIY vs. Hiring a Pro

Before deciding between a DIY approach and hiring a professional, evaluate both time investment and potential costs. While DIY projects can save money, the risks associated with improper application may lead to future expenses that could outweigh initial savings. Understanding these dynamics is crucial for making informed decisions about your home project.

Conclusion: Elevate Your Home Maintenance with Smart Caulking

By following these dos and don’ts of caulking windows, homeowners can enhance their living spaces while protecting their investments. As emerging technologies continue to shape the home improvement industry, staying informed and educating yourself on best practices will keep your projects both efficient and effective. Whether you choose to tackle the job yourself or engage a professional, the key takeaway is to approach caulking with the seriousness it deserves.

DIY Home Improvement & Repairs

Write A Comment

*
*
Related Posts All Posts
10.06.2025

Discover Oscillating Tool Blades that Maximize Performance and Value

Update Maximizing Efficiency with Oscillating Tool Blades When it comes to home improvement and DIY projects, few tools are as versatile as the oscillating multi-tool. However, the true value of this innovative device lies in the quality of the blades that accompany it. With the right oscillating tool blades, users can accomplish a wide range of tasks from cutting and sanding to scraping and grinding. Understanding which blades to select can significantly enhance both performance and results. Top Blade Options for Every Job A recent evaluation of the best oscillating tool blades reveals several standout options, each catering to specific needs. The Milwaukee 20-Piece Oscillating Multi-Tool Blade Kit garnered top marks, praised for its exceptional value and comprehensive assortment which includes blades ideal for wood, metal, and plastic. Its durability and consistent cutting performance make it a favorite among professionals and DIY enthusiasts alike, especially when it comes to flush-cutting baseboard trim or tackling more demanding repair tasks. Other noteworthy alternatives include the EZArc 7-Piece Oscillating Saw Blades and the Imperial Blades 6-Piece One-Fit Storm Variety Pack. The EZArc set provides a good balance of functionality with the inclusion of a scraper blade, making it perfect for those messy grout-removal jobs. Meanwhile, the Imperial Blades pack is noted for its compatibility and precision, particularly for tasks requiring rough cuts. The Importance of Blade Quality Not all oscillating tool blades are created equal. The performance of your multi-tool can vary significantly based on the blades you choose. While most blades now offer a universal fit across brands, it's crucial to pay attention to specific features that enhance cutting efficiency. For example, premium models like the Milwaukee blades are designed with titanium-enhanced bi-metal construction, providing superior durability and performance in various materials. Cutting Techniques and Best Practices Understanding how to properly utilize oscillating tool blades can elevate the quality of your projects. For instance, using blades designed for specific tasks, such as the Japanese fine tooth wide cut oscillating blade for carpentry, can ensure cleaner cuts and better results. Additionally, it’s essential to adapt cutting speeds and techniques according to the material being worked on. Oscillating tools can handle a variety of materials, enabling users to cut through drywall, wood, and even metal with the right blade. Future Insights on Oscillating Tools The growing popularity of oscillating multi-tools points toward a future where versatility and efficiency dominate the tool market. As manufacturers continue to innovate, we can expect blades that not only last longer but also offer smart features that communicate with tools for optimized performance based on the current task. These advancements may further streamline the workflow for contractors and DIYers alike. Making the Right Cuts When choosing oscillating tool blades, it’s essential to consider the specific tasks you'll be tackling, as well as the types of materials you'll be working with. Whether you need to rip through nails, sand an old piece of furniture, or make accurate cuts in tight spaces, there’s a blade tailored for that job. Operational safety is paramount; always follow recommended guidelines and use blades designed for your specific oscillating tool. Expanding Your Tool Collection For homeowners and contractors alike, the right assortment of oscillating tool blades can be a game-changer. Investing in a complete set like Milwaukee's not only prepares you for immediate tasks but also future-proofs your home improvement arsenal. With the right tools at your disposal, you’re well-equipped to tackle any project that comes your way. Call to Action Ready to enhance your tool collection? Explore these oscillating tool blades today and equip yourself with the best for your next home improvement project. High-quality tools lead to better results—don't settle for less!

10.05.2025

Eliminate Musty Basement Odors Quickly: Strategies for Homeowners

Update Understanding the Causes of Musty Smells in BasementsBasements often serve multi-functional purposes, from storage to recreation areas, but they can also be breeding grounds for unpleasant odors. Musty smells primarily arise from moisture and poor ventilation, leading to the growth of mold and mildew. Identifying the source of these odors is crucial—common culprits include leaks from plumbing, condensation on cold surfaces, or inadequate drainage around your home. Groundwater intrusion might also lead to persistent dampness, particularly in areas where the grading of soil directs water towards the basement or if there are cracks in the foundation. Moreover, neglecting to regularly clean can result in pet odors or stagnant air, further complicating the problem.Steps to Eliminate Musty SmellsOnce the source of the odor is identified, the next step involves effective remediation. Start by thoroughly cleaning the affected areas with solutions that tackle mold, such as vinegar or specialist mildew removers, ensuring you attend to carpets and upholstered furniture that can harbor trapped odors. For more stubborn smells or mold infestations, advanced treatments using chlorine dioxide can be particularly effective, as they penetrate deeply into surfaces and eliminate odor-causing compounds. To ensure long-lasting freshness, repairs to leaks or moisture sources are essential. If the basement is prone to humidity, employing a dehumidifier can significantly help. Aim for a humidity level of about 50% to prevent the re-growth of mold and mildew. Regular maintenance, such as keeping P-traps filled with water and watching for leaks, is key to preserving a clean, odor-free space.The Right Tools for the JobInvesting in the right tools can make all the difference in combating musty odors. While solutions like baking soda and vinegar can mitigate surface-level smells, professional-grade products like specialized odor eliminators offer deeper penetration and longer-lasting results. For ongoing maintenance, utilizing moisture absorbers, such as silica gel or charcoal packs, will prove beneficial in keeping humidity levels down and preventing sense irritants from reinfesting your space.Preventative Strategies: Creating a Healthy Basement EnvironmentAfter tackling existing odors, implementing lightweight preventative measures can help you maintain a fresh-smelling basement. Ensure proper ventilation by installing fans or vents to promote air circulation. It’s also advisable to conduct regular inspections for any signs of leaks or moisture. This proactive approach not only preserves the usability of your basement but contributes to a healthier home environment overall.Final Thoughts: Keeping Your Basement FreshMusty odors can make a basement uncomfortable and unusable. By understanding the root causes and employing effective remediation methods, homeowners can reclaim their basement spaces. Besides cleaning and repairing, adopting regular maintenance routines such as air circulation and humidity control fosters an environment conducive to prolonged freshness. A well-maintained basement not only improves the comfort of a home but can also positively impact the overall property value.

10.04.2025

Discover the Best Step Stools: Stability, Portability & Durability Matters

Update Step Up Your Home Projects: The Ultimate Guide to the Best Step Stools In the realm of DIY home improvement, a step stool can be your greatest ally, whether you are hanging pictures, changing light bulbs, or reaching into high cabinets. But with a vast array of options available, how do you determine which step stool will truly meet your needs? In this comprehensive guide, we explore some of the best step stools on the market today, examining quality, safety features, design aesthetics, and value for money. Choosing the Right Step Stool: Key Features to Consider When it comes to selecting the best step stool, several critical attributes demand attention. Let's delve deeper into each feature and its importance. Material Construction: Weighing Durability and Portability Step stools come in various materials, including plastic, wood, and metal, each with its pros and cons. Plastic stools are lightweight and resistant to wet conditions — ideal for bathroom or outdoor use. Conversely, wooden stools provide sturdiness and a classic aesthetic but may not hold up well in moisture-prone environments. Metal varieties, especially those made from high-grade steel or aluminum, offer both strength and longevity, making them versatile across indoor and outdoor tasks. Height and Design: Function Meets Style The height of the stool is another essential consideration. Depending on whether you're using it for minor tasks or more significant home projects, the right height can make all the difference. Many households benefit from opting for a two or three-step design that allows versatility for various tasks, such as accessing high cabinets or display items. Furthermore, modern designs have begun to incorporate aesthetics, allowing for stylish stools that blend into your home decor seamlessly. Safety Features Safety should never be compromised when choosing a step stool. Look for features like nonslip feet and wider treads to enhance balance when standing on the steps. Some models include additional security features, such as locking mechanisms and handrails, providing added peace of mind when reaching for those hard-to-reach items. For instance, the HBTower 2-Step Folding Steel Ladder, praised as the best overall, is designed with an automatic locking mechanism, ensuring stability during use. Top Step Stools of the Year: Expert Recommendations We analyzed numerous models based on stability, portability, and construction quality, selecting the top step stools that warrant your attention. Here are the standout picks: 1. Best Overall: HBTower 2-Step Folding Steel Ladder This model features a robust alloy steel frame that can support the highest weight capacity of 500 pounds. It’s not only sturdy but also lightweight, allowing for easy mobility — making it perfect for both home and professional use. 2. Best Bang for the Buck: Rubbermaid 2-Step Steel Step Stool This cost-effective option excels in stability and safety, with a weight capacity of 225 pounds. Its attractive appearance doesn’t sacrifice durability, and features like nonslip rubber feet help keep it secure on various surfaces. 3. Best Design: Lark Manor Ashvir 2-Step Wood Step Stool For those who value aesthetics as much as functionality, this wooden option is both stylish and effective, supporting up to 375 pounds with crafted wood finishes that blend well in any room. 4. Best Three-Step: Little Giant Ladders 3-Step Jumbo Step Stool With a comfortable platform height of 26 inches, this model is perfect for more demanding tasks. Its aluminum construction provides both strength and stability, and the large platform allows for easy maneuvering while working. 5. Best Heavy-Duty: Cramer Kik-Step Steel Step Stool The rolling design of the Cramer Kik-Step makes it an innovative choice for those frequently repositioning their stool, while its sturdy steel frame ensures lasting performance. DIY Your Own Step Stool: A Fun Project for Home Improvement Enthusiasts For the hands-on homeowner, creating a step stool can be an enjoyable DIY project. With basic tools and materials, you can craft a custom stool that meets your specific needs. Online tutorials and plans are ample, ranging from beginner to expert levels, ensuring that anyone can make a functional and stylish stool. Conclusion: Elevate Your Home Projects Safely Choosing the right step stool can elevate your home improvement tasks significantly while ensuring safety and comfort. By investing in a high-quality, well-designed stool, you can make every project simpler and more efficient. Don’t overlook the importance of this essential tool — it may just become a staple in your DIY toolkit. To further explore the featured models and enhance your home efficiency, check out the latest selections available today!

Terms of Service

Privacy Policy

Core Modal Title

Sorry, no results found

You Might Find These Articles Interesting

T
Please Check Your Email
We Will Be Following Up Shortly
*
*
*