 Add Row
  Add
Add 

Mastering the Art of Cabinet Molding Installation
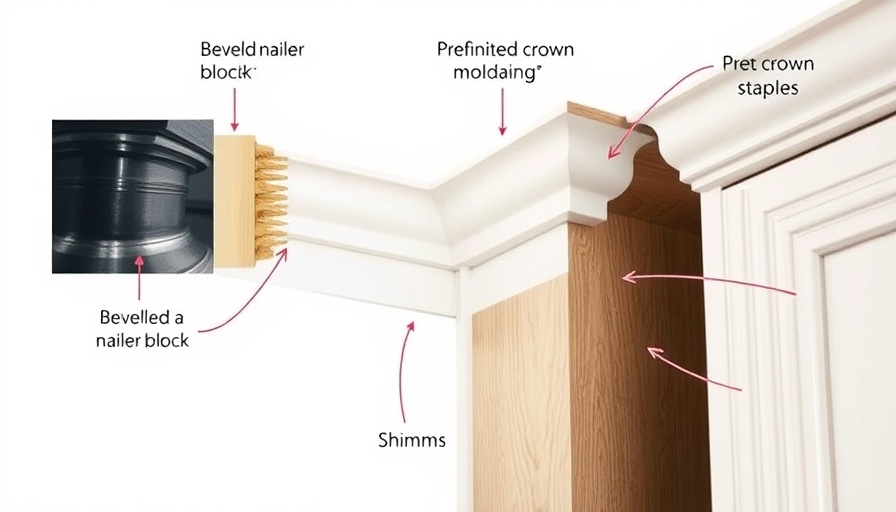
When it comes to enhancing the aesthetics of your kitchen or bathroom, prefinished cabinet molding serves both functional and decorative purposes. This addition can dramatically transform the look of your cabinets, giving them a polished, professional appearance. However, many homeowners and DIY enthusiasts may feel intimidated at the thought of installation. But fear not! With the right tools, techniques, and a little patience, adding this finishing touch can be both achievable and rewarding.
Understanding Prefinished Cabinet Molding
Prefinished cabinet molding comes ready to install, meaning you won’t have to spend additional time painting or staining. This offers a significant advantage for those looking to save time while maintaining a sleek look. Available in various styles and materials, you can find molding that perfectly complements your cabinetry and overall design aesthetic.
Essential Tools for the Job
To successfully install prefinished cabinet molding, gathering the right tools is crucial. Here are some essentials:
- Coping saw: Ideal for intricate cuts where two pieces of molding meet at an angle.
- Miter saw: Perfect for cutting molding pieces at precise angles.
- Stud finder: Helps locate wall studs for secure mounting.
- Level: Ensures that your molding is installed evenly and straight.
- Adhesive and finishing nails: Essential for securing your molding in place.
Step-by-Step Installation Guide
Follow these straightforward steps to achieve a seamless installation:
- Measure & Cut: Begin by carefully measuring the spaces where the molding will be installed. Use your miter saw to cut the molding at 45-degree angles for outside corners and 22.5 degrees for inside corners. Always cut a little longer; you can trim excess as needed.
- Secure the Molding: Begin at the top corner of your cabinets. Hold the molding in place, ensuring it's level, and use your adhesive to attach it. If using finishing nails, hammer them in at an angle for better hold.
- Fill Gaps and Sand: After your molding is securely attached, apply wood filler to any nail holes and corners that need smoothing. Once dried, lightly sand the filled areas until smooth.
- Final Touch: For an extra polished finish, consider applying a coat of furniture polish to enhance the color and protect the surface of your molding.
The Final Look and Lasting Impact
Successful installation of prefinished cabinet molding not only elevates your cabinet aesthetics but also adds value to your home. Home improvement projects, like this one, can yield substantial returns on investment while enhancing your personal living space. In tandem with other elements of renovation, such as shelving, lighting, and counter finishes, molding can tie everything together beautifully.
Future Trends and Innovations in Home Design
As home design continues to evolve, the trend of incorporating prefinished materials remains strong. Homeowners are increasingly favoring choices that minimize maintenance and maximize style. In the future, we can expect to see greater variety in prefinished options, including eco-friendly materials that cater to the growing demand for sustainable living.
Adding prefinished cabinet molding is more than just a design choice; it’s a commitment to enhancing the overall experience of your home. By investing your time and effort into this DIY project, you're taking the first step toward improving your living space and increasing your home’s value.


Write A Comment